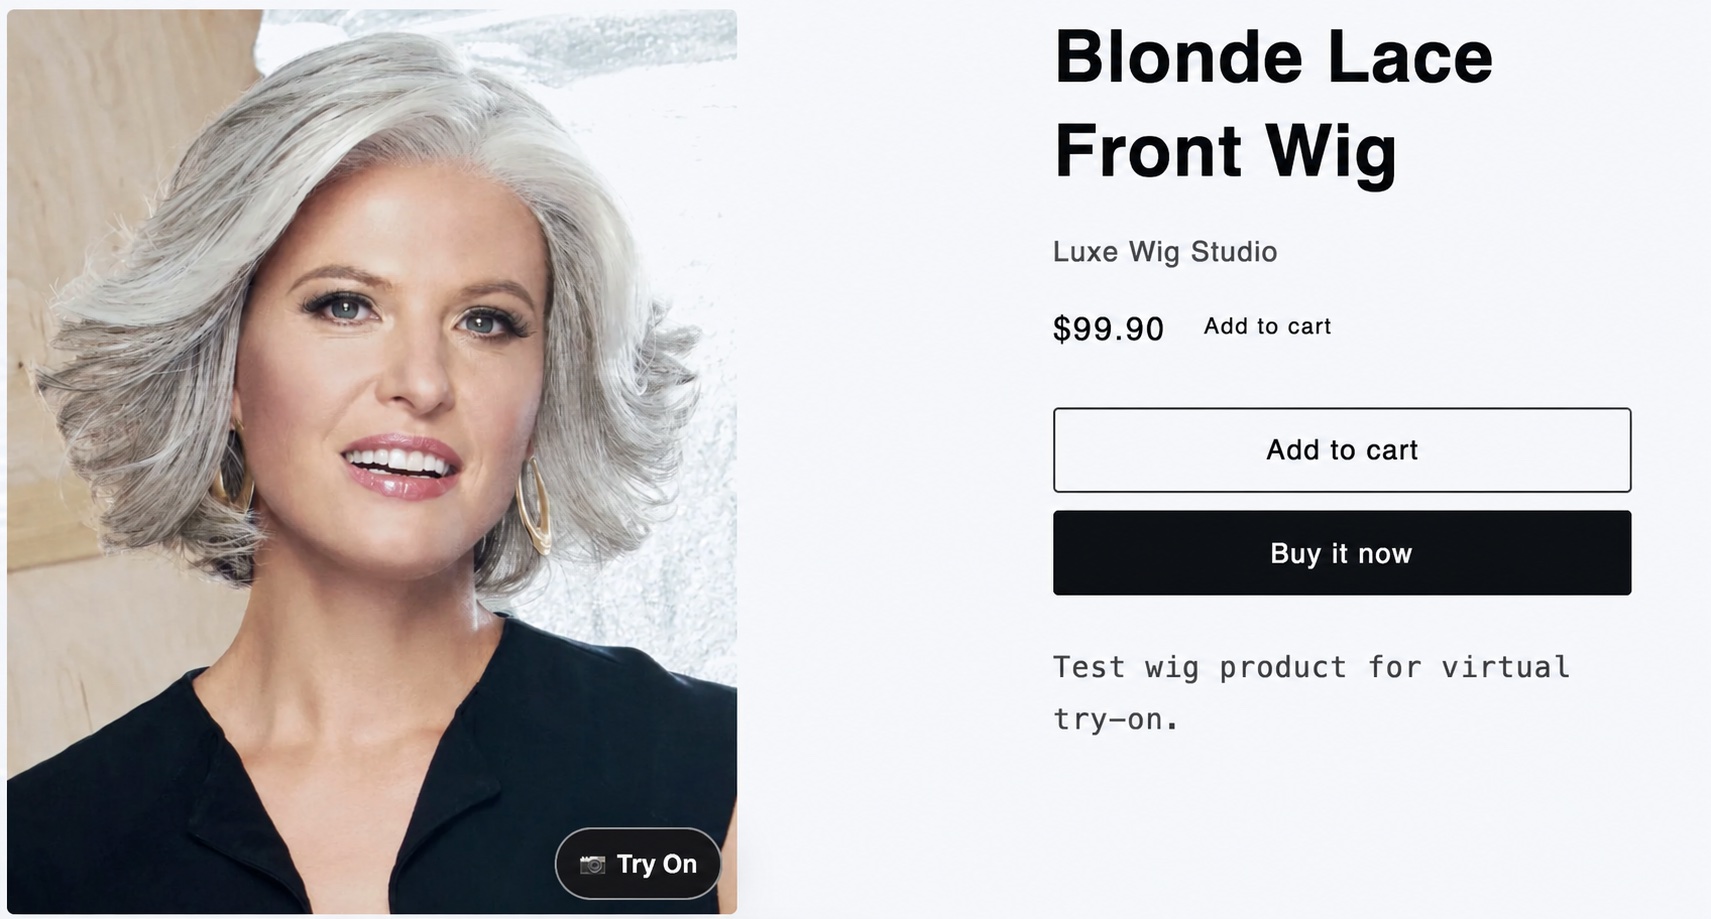
For wig shoppers, the product image is the center of the buying decision. They look at the cut, color, density, length, bangs, lace area, and face-framing details before deciding whether a wig feels right. That is why the Try On entry point works best directly on the product image, not hidden in a separate page.
This guide explains how Shopify wig stores can add a Try On button to selected product pages using TryHair - Wig Try-On.
Step-by-step: add a Try On button to Shopify wig products
Install TryHair from the Shopify App Store
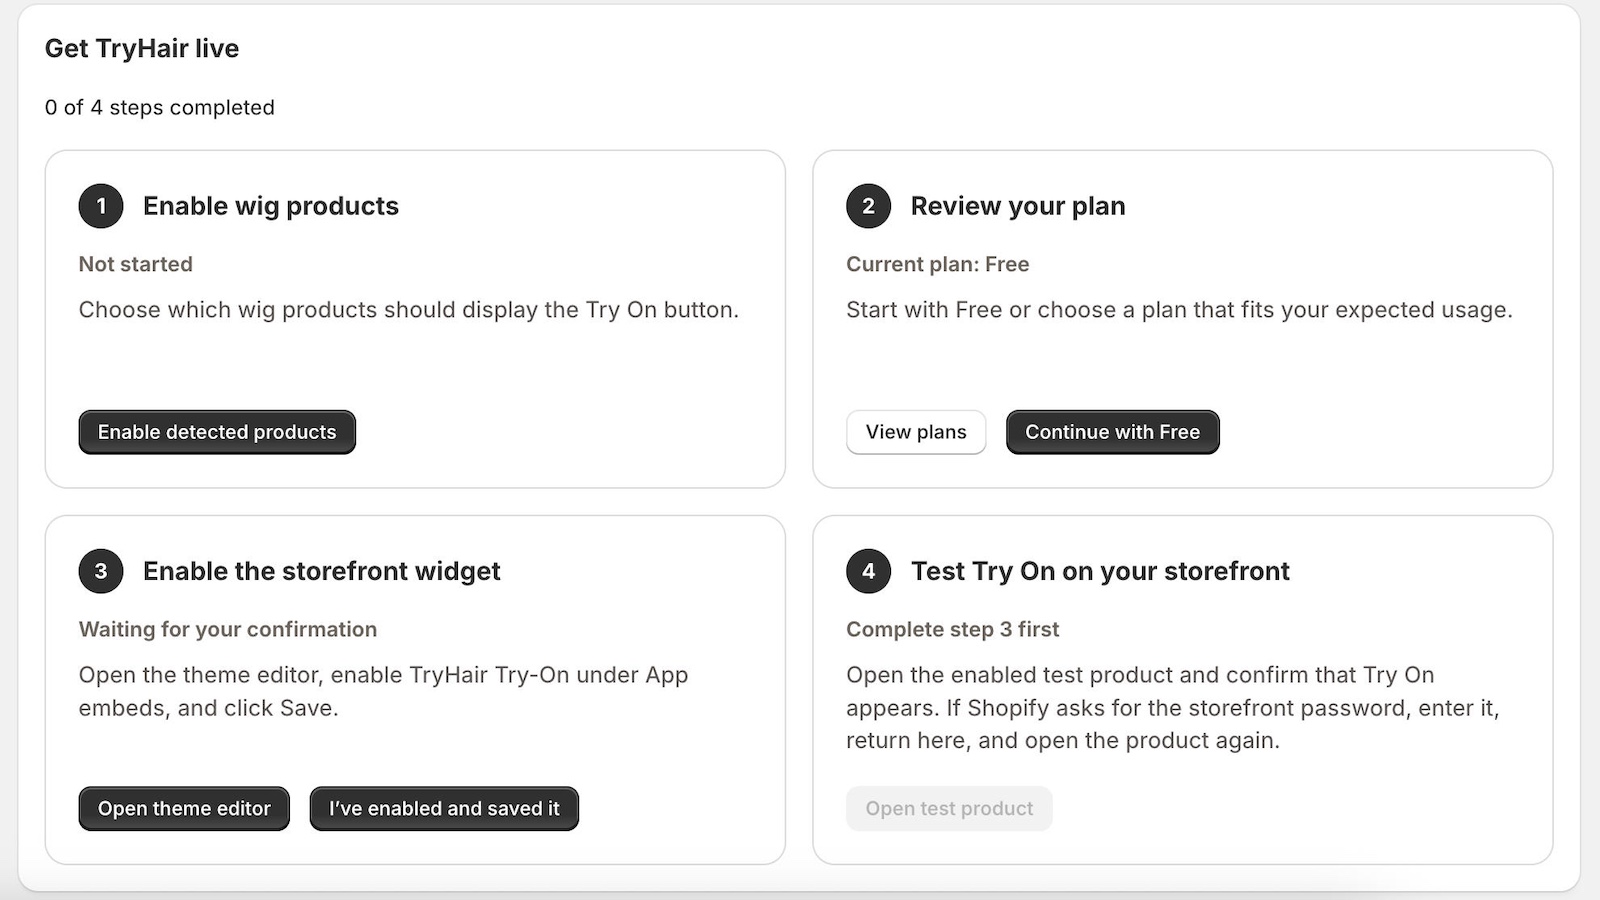
Start by installing TryHair - Wig Try-On from the Shopify App Store. After installation, the app opens inside Shopify Admin and guides you through the setup checklist.
Choose which wig products should support Try On
Enable the products where a virtual try-on experience makes sense. Clear front-facing or near-front wig images usually work best. You do not need to enable every product at once; many stores start with popular styles, best sellers, or products where shoppers often hesitate.
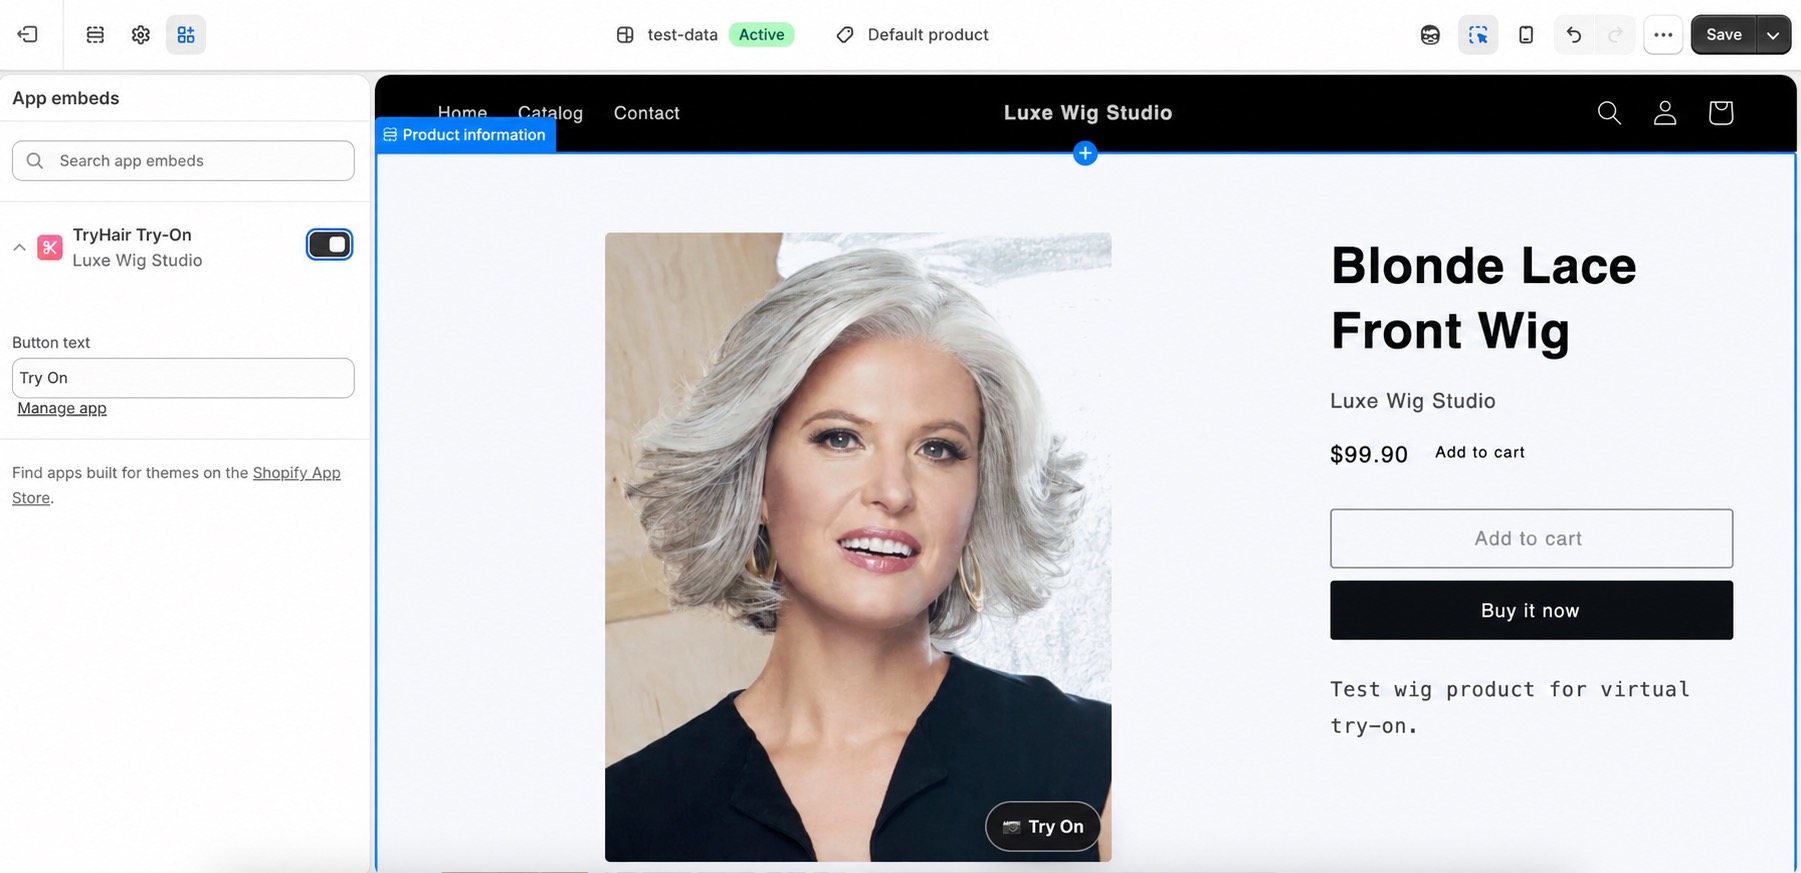
Enable the TryHair App Embed in your Shopify theme
Open the Shopify theme editor, go to App embeds, turn on the TryHair Try-On embed, and click Save. This is the step that allows the storefront button to appear without manually changing theme files.
Open an enabled product page and test the button
Visit the live storefront, open an enabled wig product, and check the product image. The Try On button should appear on the selected image. Click it, upload a clear front-facing photo, and run a test preview.
What product images work best?
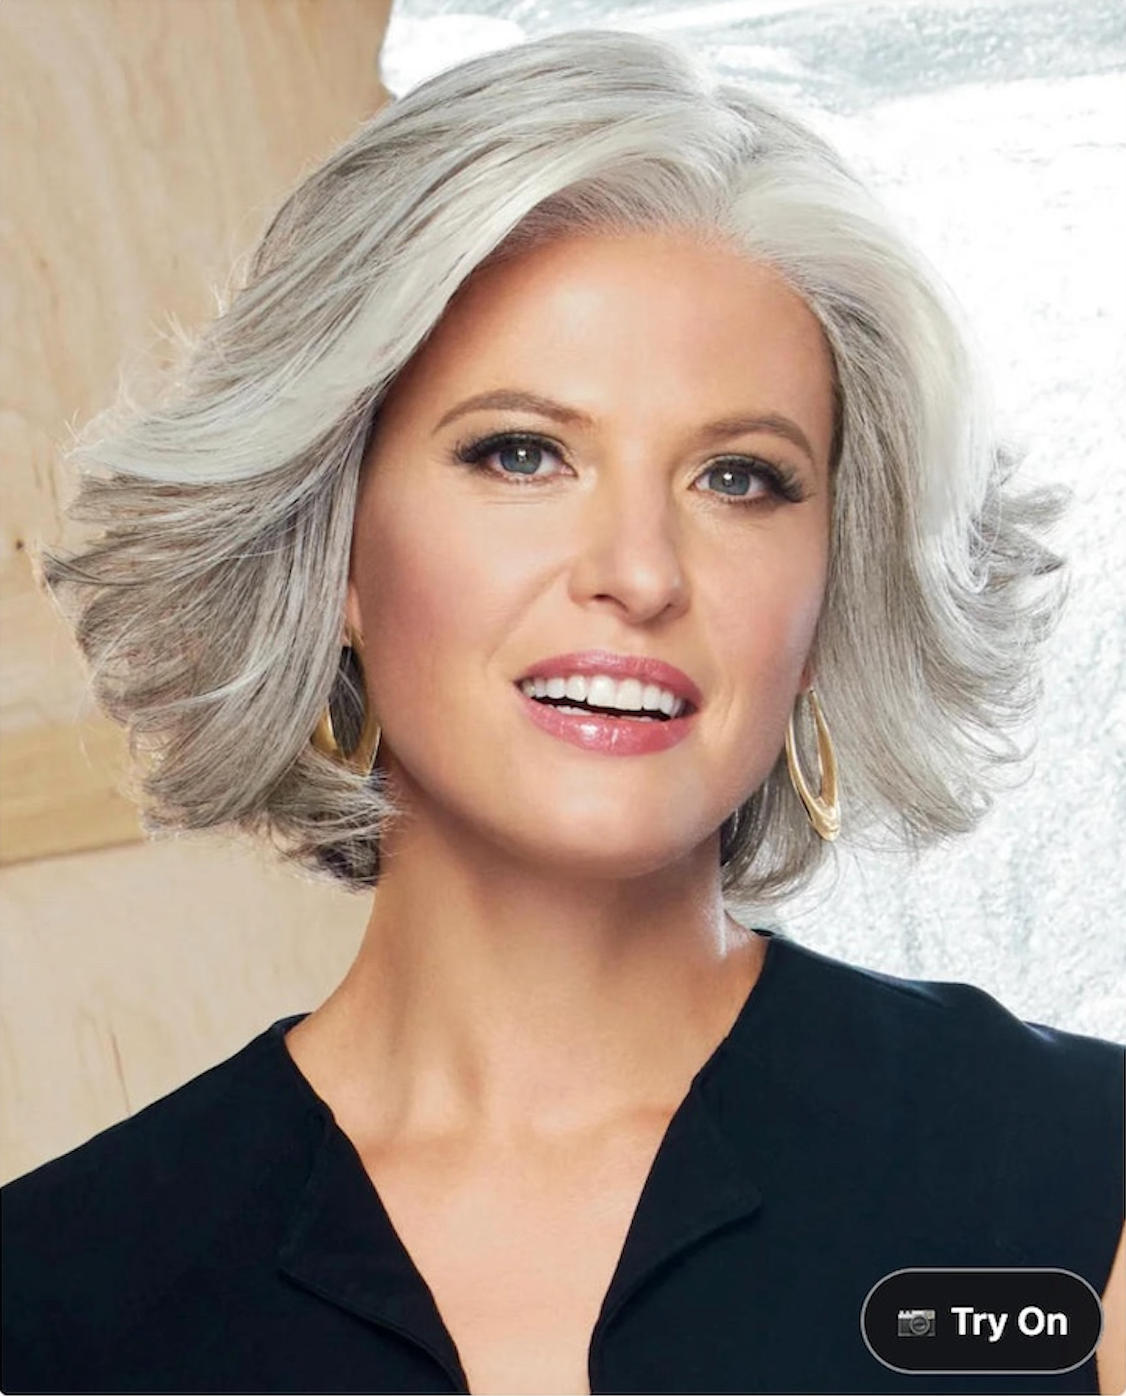
The Try On button can appear on selected product images, but the quality of the wig image still matters. Good product photos make the shopper experience easier to understand and help the virtual preview feel more useful.
- Use one wig per image.
- Prefer front or near-front wig views.
- Keep the full hairstyle visible, including the top and ends.
- Avoid side-only, back-only, heavily cropped, or cluttered images.
- Use consistent product photography across your wig collection where possible.
Why the button should be close to the product image
The shopper is already looking at the wig photo when they are deciding whether the style feels right. Placing the Try On button directly on the image keeps the action close to the decision. That makes the feature easier to notice and easier to understand.
This is especially useful for lace front wigs, glueless wigs, highlighted wigs, bangs, bobs, curls, and other styles where face framing changes the shopper’s perception of the product.
Common reasons the Try On button may not appear
FAQ
Can I add a Try On button without editing Shopify theme code?
Yes. TryHair uses Shopify app installation and a theme app embed, so you do not need to manually edit theme files.
Can I decide which products show the Try On button?
Yes. You can enable Try On for selected wig products instead of enabling it across the entire catalog.
Does the Try On button appear on every product image?
It appears for enabled wig products and supported product image media. The exact storefront behavior can depend on the current product image and theme layout.
What should shoppers upload?
Ask shoppers to upload a clear, front-facing photo of themselves. A simple, well-lit photo usually works better than a side angle, group photo, or heavily obstructed image.
Add a Try On button to your Shopify wig products
TryHair - Wig Try-On adds a Try On button to selected Shopify product images, allowing shoppers to upload a photo and preview a wig before purchasing. Setup takes about one minute, with no theme coding required.