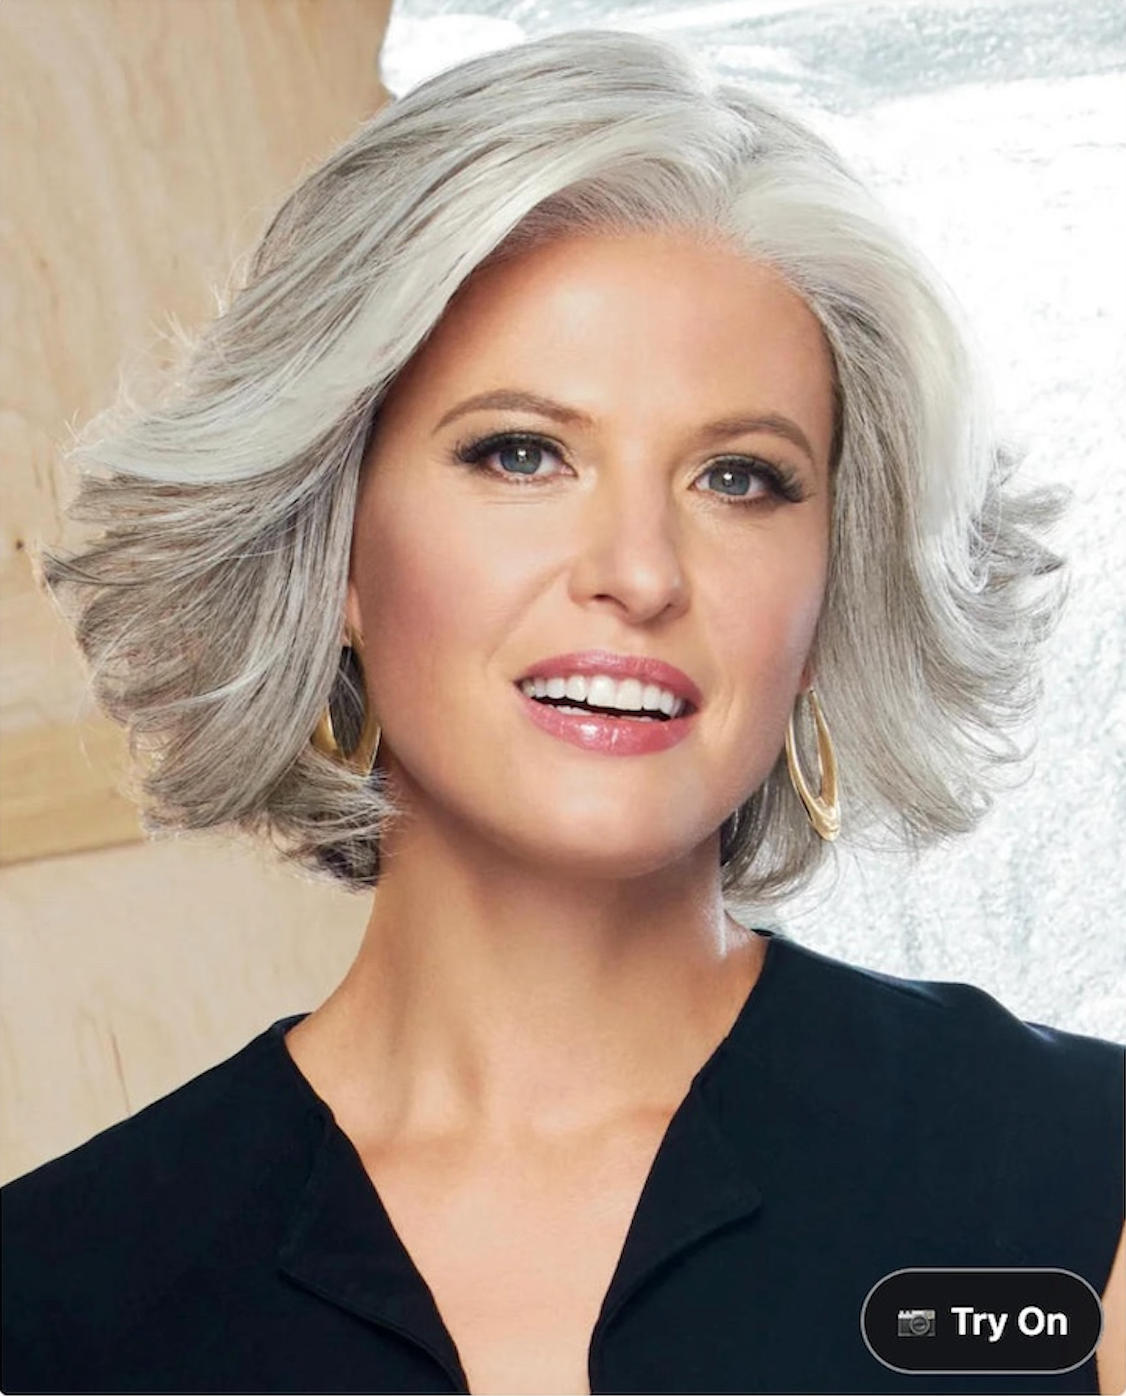
If you sell wigs online, one of the hardest parts of the purchase journey is simple: shoppers want to know how a style might look on them. Product photos, model photos, color swatches, and reviews all help, but they still require imagination. A virtual wig try-on tool reduces that gap by letting shoppers upload a photo and generate a preview before they buy.
For Shopify stores, the best version of this experience should be easy to install, easy to control, and visible exactly where shoppers are making product decisions: on the product page.
What virtual wig try-on adds to a Shopify store
Virtual try-on gives wig shoppers a quick way to compare length, silhouette, bangs, color placement, and overall style against their own face. It is not a replacement for accurate product photography or fit guidance, but it can make the browsing experience more personal and memorable.
With TryHair - Wig Try-On, the experience is designed around Shopify merchants. You choose which products should support try-on, enable the storefront widget, and the app adds a Try On button to those selected product images.
How to add virtual wig try-on to Shopify
1. Install a Shopify virtual wig try-on app
Start by installing a Shopify app built specifically for wig try-on. TryHair - Wig Try-On is available on the Shopify App Store and supports a Free plan, so a store can test the experience before committing to a paid plan.
2. Select the wig products that should show Try On
Not every product image is equally suitable for virtual try-on. Choose clear wig images where the wig is visible from the front or near-front, and avoid images where multiple wigs appear in the same frame. This keeps the shopper experience more consistent.
3. Enable the storefront widget
After choosing products, enable the Shopify theme app embed. This allows the storefront Try On button to appear without manually editing theme code. For most stores, this is the difference between a technical project and a quick setup task.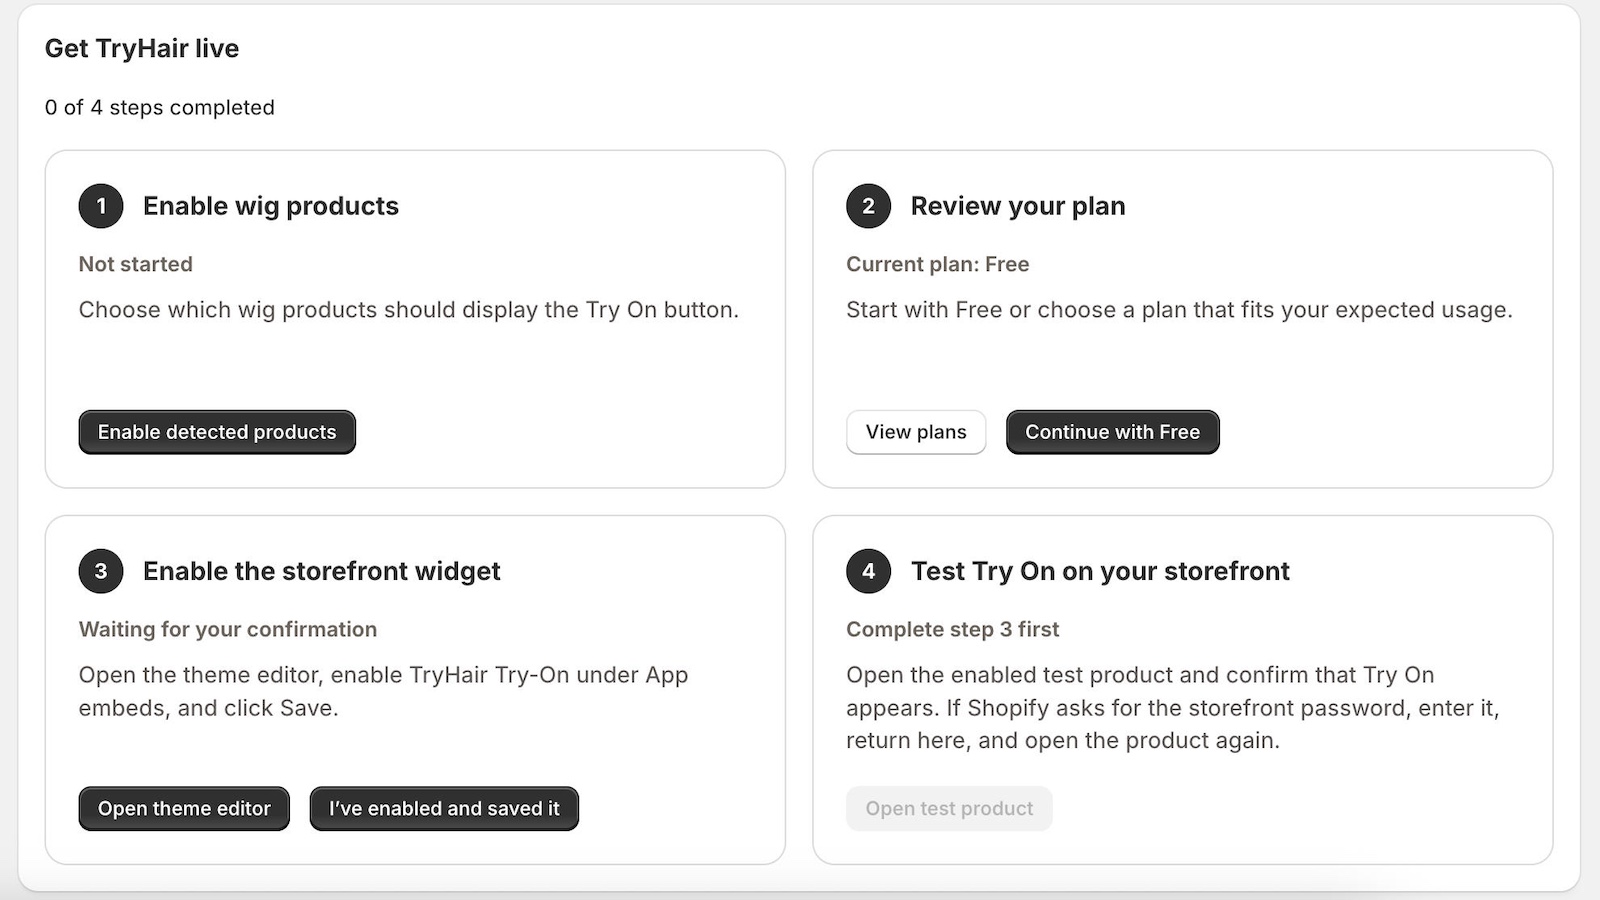
4. Test the customer experience on a product page
Open one of the enabled products on your live storefront and check that the Try On button appears in the expected position. Then upload a clear, front-facing photo and generate a preview. This helps you confirm both sides of the flow: what the shopper sees before uploading and what they see after generation.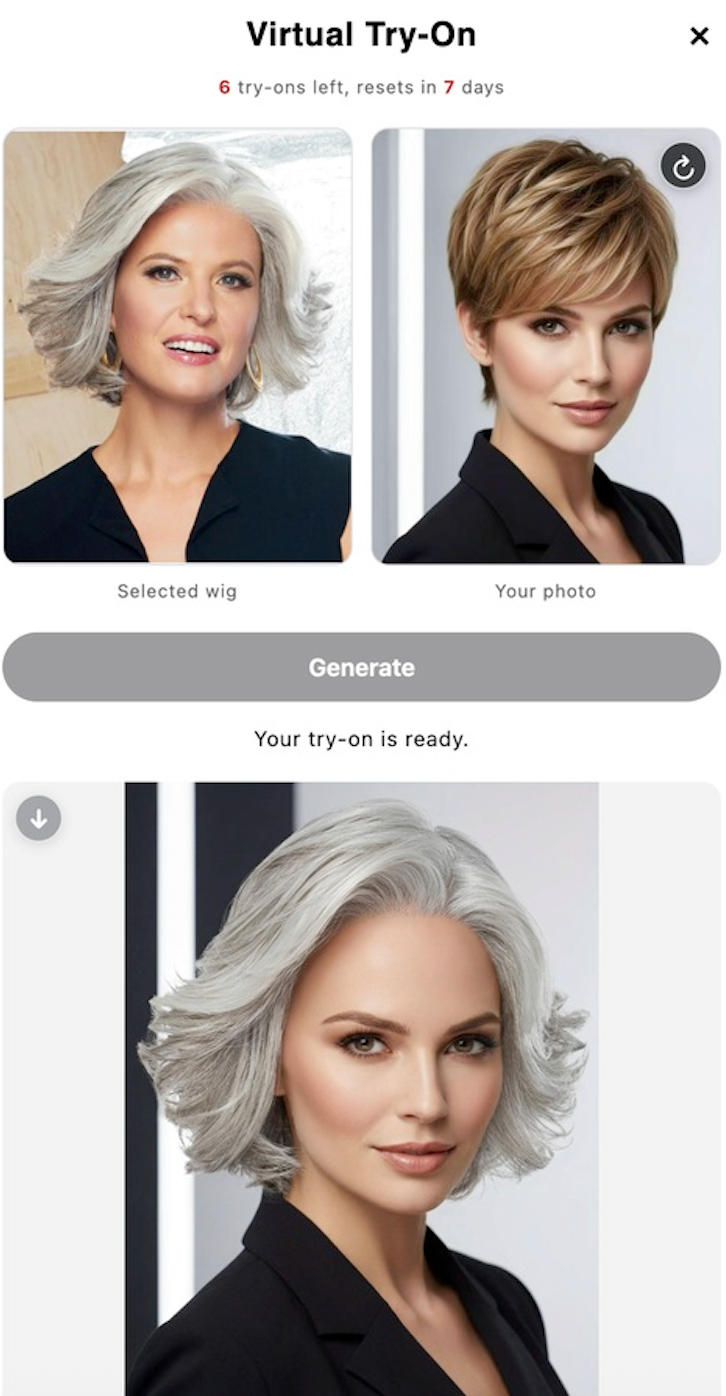
Product image tips for better wig try-on results
The quality of the selected wig image matters. For best results, use product photos that show one wig clearly, with the full hairstyle visible. Front-facing or near-front views usually work better than side, back, or heavily cropped images.
- Use one wig per product image.
- Prefer front or near-front views.
- Keep the full wig visible, including the top and ends.
- Avoid busy backgrounds when possible.
- Use consistent product photography across your collection.
Many wig stores use a mix of human model photos, mannequin photos, and product-only shots. A good virtual try-on flow should support common wig retail photography patterns, while still guiding merchants away from images that are too unclear for shoppers.
Why place the Try On button on product images?
Product images are where shoppers already focus their attention. Placing the Try On button directly on selected product images keeps the action close to the product decision instead of hiding it in a separate page, quiz, or navigation item.
This also makes the feature easier to understand. A shopper sees the wig, sees Try On, uploads a photo, and previews the result. The path is short, which matters on mobile storefronts where extra steps can quickly create drop-off.
If your main goal is the product-page button itself, read how to add a Try On button to Shopify wig product pages. If you are planning a broader ecommerce stack, see our guide to the best Shopify apps for wig stores. If your goal is lowering preventable exchanges or returns, read how wig stores can reduce returns with virtual try-on. To explain the customer-facing value, see the benefits of virtual wig try-on for online wig shoppers. No. TryHair is designed to work through Shopify app installation and a theme app embed, so merchants do not need to manually edit theme code. Yes. You can enable Try On only for selected wig products, which is useful when some products have better images than others. No. It works best as an additional shopping aid. Strong product photos, accurate color information, length details, and return policies are still important. Yes. TryHair offers a Free plan for Shopify stores that want to test virtual wig try-on before upgrading. TryHair - Wig Try-On adds a Try On button to selected Shopify product images, helping shoppers preview wigs before purchasing. Setup takes about one minute, with no theme coding required.FAQ
Do I need to edit my Shopify theme code?
Can I choose which products show the Try On button?
Does virtual try-on replace product photos?
Can I start free?
Ready to add wig try-on to your Shopify store?